
There’s something undeniably satisfying about biting into a perfectly grilled steak—charred on the outside, juicy and tender on the inside, with just the right amount of seasoning to let the meat shine. Whether you’re firing up a charcoal grill for the first time or consider yourself a seasoned backyard chef, learning how to grill the perfect steak is a skill that elevates any cookout from average to unforgettable.
But mastering steak grilling isn’t just about throwing meat on a hot grate. It’s about understanding the cut, controlling heat, knowing when to flip, and nailing that perfect level of doneness. The good news? With the right techniques—and a few pro tips—you can consistently grill steak like a restaurant chef, right from your own backyard.
In this guide, we’ll break down everything you need to know: from choosing the best cut to achieving that flawless sear, locking in flavor, and finishing like a pro. Get ready to impress with steak that’s grilled to perfection—every single time.
Choosing the Right Cut of Steak
Grilling the perfect steak starts long before you fire up the grill. The cut you choose plays a major role in the steak’s texture, flavor, and tenderness. Not all steaks are created equal—some are rich and fatty, while others are lean and firm. Understanding the differences will help you pick the best steak for your preferences and grilling style.
Ribeye vs Sirloin vs Filet Mignon
When it comes to popular grilling cuts, these three are the go-to favorites:
- Ribeye is known for its rich marbling and intense beefy flavor. The fat melts during grilling, creating a juicy, tender steak with a buttery texture. It’s ideal for high-heat grilling and is often considered the most flavorful cut.
- Sirloin is a bit leaner but still flavorful. It’s a great middle-ground option—affordable, easy to cook, and well-suited for marinades. It’s perfect for those who want a slightly firmer texture without sacrificing taste.
- Filet Mignon is prized for its incredible tenderness. It’s the leanest of the three and has a very mild flavor, often enhanced with compound butters or rich sauces like béarnaise.
Each cut has its strengths, so choose based on whether you prioritize flavor, tenderness, or a balance of both.
Importance of Marbling
Marbling refers to the thin streaks of intramuscular fat that run through the meat. This fat doesn’t just make the steak look appealing—it plays a critical role in flavor and juiciness.
When grilled, marbled fat melts into the steak, basting it from the inside out. The result is a tender, flavorful bite that’s hard to achieve with leaner cuts. For the best grilled results, look for cuts with visible marbling (like USDA Prime or Choice grades if you’re in the U.S.).
Bone-In vs Boneless Steaks
Another decision to make: bone-in or boneless?
- Bone-in steaks, like T-bones and porterhouses, retain heat better and can add a subtle depth of flavor. The bone acts as insulation, helping the steak cook more evenly, especially when using indirect heat. They also look dramatic and rustic on the plate.
- Boneless steaks (like boneless ribeye or sirloin) cook a bit faster and are easier to manage on the grill, making them ideal for beginners.
Both are great—just consider your experience level and desired presentation.
Budget-Friendly Options That Still Taste Great
You don’t have to splurge on premium cuts to enjoy a good grilled steak. Some less expensive cuts offer excellent flavor when prepared properly:
- Flank steak – lean and beefy, great for marinating and slicing thin.
- Skirt steak – thinner and very flavorful, ideal for fast grilling and fajitas.
- Flat iron steak – tender and affordable, often overlooked but excellent when grilled to medium-rare.
- Chuck eye steak – sometimes called the “poor man’s ribeye,” it’s flavorful and much cheaper.
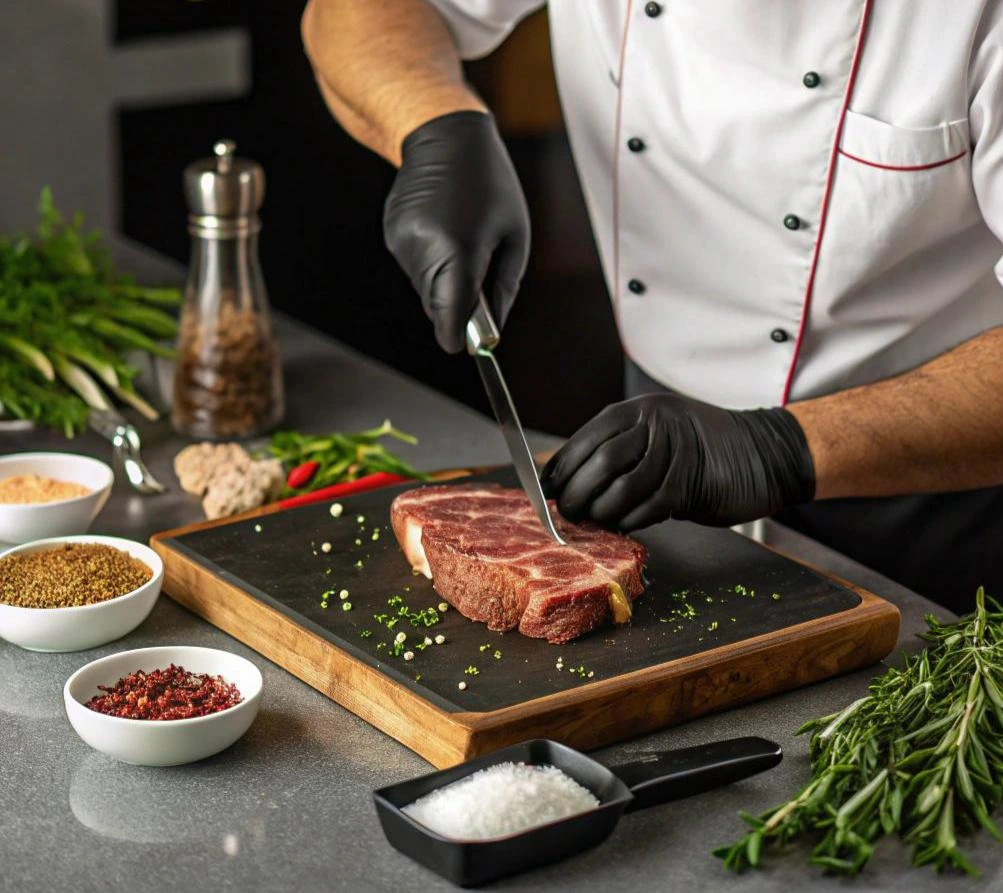
Prepping Your Steak Like a Pro
Even the best steak cut won’t live up to its potential without proper preparation. Prepping your steak correctly sets the foundation for flavor, texture, and cooking precision. From seasoning to handling, small steps make a big difference. Here’s how the pros do it.
To Marinate or Not to Marinate?
This is one of the most common questions among home grillers. The answer depends on the cut and goal:
- Tender cuts like ribeye or filet mignon don’t need a marinade—they already have natural tenderness and rich flavor. Marinating them could mask their quality.
- Tougher, leaner cuts like flank steak, skirt steak, or sirloin benefit from marinating, especially when you use acidic ingredients (like citrus juice or vinegar) to help break down muscle fibers.
Keep marinades simple—oil, acid (like lime or balsamic vinegar), aromatics (garlic, shallots), and spices. Avoid over-marinating (generally no more than 2–4 hours for most steaks), or the texture can become mushy.
Dry Brining with Salt
One of the most underrated chef secrets is dry brining—seasoning your steak with salt ahead of time and letting it rest uncovered in the fridge for 1–24 hours.
Here’s why it works:
- Salt draws moisture to the surface, then reabsorbs it into the meat, enhancing internal flavor and moisture retention.
- It helps create a better sear and crust when grilled.
Use kosher salt or sea salt for even coverage. Avoid fine table salt, which can over-salt the meat.
Seasoning Basics
You don’t need a dozen spices to bring out a steak’s best qualities. In fact, most chefs keep it simple:
- Kosher salt – helps enhance the meat’s natural flavor.
- Fresh cracked black pepper – adds depth and a slight bite.
- Optional extras: garlic powder, smoked paprika, or a hint of cayenne for heat.
If you’re using a thick cut, don’t be shy—season generously and evenly on all sides, including the edges. Let the steak sit for 30–60 minutes at room temperature after seasoning if you didn’t dry brine earlier.
Letting the Steak Reach Room Temperature
A crucial step many skip: bringing the steak to room temperature before grilling.
Why it matters:
- Cold steak cooks unevenly and takes longer to reach the desired doneness.
- Room temperature steak sears more easily and cooks more consistently from edge to center.
Take your steak out of the fridge about 30–45 minutes before grilling. If it’s a thick cut (like a tomahawk), you may need closer to an hour.
Grilling Techniques for Steak Perfection
Now that your steak is perfectly prepped, it’s time to hit the grill. But great grilling isn’t just about heat—it’s about control, timing, and method. Whether you’re using a gas grill, charcoal, or even a cast iron pan on an open flame, these pro-approved grilling techniques will help you achieve that crave-worthy crust and juicy interior every time.
Gas vs. Charcoal Grills
One of the first decisions you’ll face: gas or charcoal? Each has its strengths, and knowing the difference can help you choose the best tool for the job.
- Gas grills are convenient, quick to heat, and offer excellent temperature control. They’re perfect for weeknight dinners or when you need consistency.
- Charcoal grills deliver that deep, smoky flavor you simply can’t replicate with gas. They take longer to heat and require more attention, but many grill masters say it’s worth the effort for the rich, wood-fired taste.
Tip: If you’re using a gas grill but want more smoke flavor, consider adding wood chips in a smoker box.
Direct vs. Indirect Heat
Understanding heat zones is key to controlling doneness and avoiding flare-ups.
- Direct heat is when the steak is placed directly over the flame or coals. It’s ideal for searing and building a flavorful crust.
- Indirect heat means placing the steak to the side of the flame, allowing it to cook more slowly and evenly without burning.
Pro method: Start your steak with direct heat for a quick sear, then move it to indirect heat to finish cooking to your desired doneness—especially useful for thick cuts.
The Reverse Sear Method
Want to grill steak like a chef? The reverse sear is a game-changing technique.
Here’s how it works:
- Slow-cook the steak over low, indirect heat until it’s just under your target internal temperature.
- Rest it briefly.
- Sear it over high, direct heat for 1–2 minutes per side to lock in juices and create a golden-brown crust.
This method delivers precise doneness and a beautifully even color edge to edge—ideal for thick cuts like ribeye, strip, or tomahawk steaks.
How to Get Perfect Grill Marks
Grill marks are more than just visual flair—they indicate proper searing and heat contact.
Follow these tips for Instagram-worthy grill lines:
- Preheat your grill until it’s hot (about 450–500°F / 230–260°C).
- Oil the grates (not the steak) to prevent sticking.
- Place the steak at a 45-degree angle across the grates.
- After 2 minutes, rotate 90 degrees to create crosshatch marks.
- Flip and repeat on the other side.
While grill marks look great, remember: browning = flavor—so don’t sacrifice a full sear just for perfect lines.
With the right grill setup, controlled heat zones, and a few professional techniques like the reverse sear, you’re well on your way to steak mastery. In the next section, we’ll look at how to nail the perfect doneness every time, using a tool every grill master swears by: the meat thermometer.
Timing , Temperature & Doneness
Perfectly grilled steak isn’t just about great seasoning or a hot grill—it’s about precision. Overcooking can ruin even the best cut of meat, while undercooking might not suit your guest’s taste. Learning how to control internal temperature and time your cooking is essential for achieving restaurant-quality results at home.
Using a Meat Thermometer
If you want to grill steak with consistent results, a meat thermometer is your best friend. The old-school methods of poking the meat or comparing it to the feel of your palm are unreliable and imprecise.
Why use one?
- Ensures food safety (especially with thicker cuts).
- Helps hit your exact preferred doneness every time.
- Prevents overcooking or serving raw centers by accident.
Pro tip: Insert the thermometer into the thickest part of the steak without touching bone or fat. For best accuracy, use an instant-read digital thermometer.
Internal Temperatures for Each Doneness Level
Knowing the correct temperature ranges for steak doneness is crucial. Here are the general internal temperature guidelines (note: remove the steak from heat 3–5°F before your target, as it continues cooking while resting):
- Rare: 120–125°F (49–52°C) – cool, red center
- Medium Rare: 130–135°F (54–57°C) – warm, red center (recommended by most chefs)
- Medium: 140–145°F (60–63°C) – warm, pink center
- Medium Well: 150–155°F (65–68°C) – slightly pink center
- Well Done: 160°F+ (71°C+) – fully cooked, little to no pink
Important: Thinner steaks cook faster and are harder to manage at rare or medium rare, so always monitor carefully.
Resting Your Steak
Resting might seem like a small step, but it’s a non-negotiable move in grilling like a pro.
When steak comes off the grill, its juices are pushed toward the center by heat. If you slice it too soon, all that flavorful juice ends up on the cutting board instead of in your bite.
Resting tips:
- Let the steak rest for 5–10 minutes, depending on thickness.
- Tent it loosely with foil to retain warmth.
- This allows juices to redistribute evenly, resulting in a juicier, more tender steak.
Cutting into the Steak (at the Right Time)
Once rested, it’s time to slice—but even this has technique.
- Always cut against the grain (the visible muscle fibers) to shorten the fibers and make each bite more tender.
- For presentation, cut at a slight angle for steakhouse-style plating.
- If you’re serving steak family-style, pre-slice it just before serving for ease and elegance.
Mastering timing and temperature takes practice, but it’s the ultimate difference between just OK and absolutely perfect steak. Next, we’ll explore the finishing touches that elevate your grilled masterpiece—like garlic butter, basting herbs, and chef-level plating tips.
Pro Tips to Elevate Your Grilled Steak
While perfecting your steak’s cut, seasoning, and cooking technique will set a solid foundation, the final touches are what truly elevate your grilled steak from good to extraordinary. From finishing with rich butters to pairing with bold sauces, here are the chef-approved tricks to make your grilled steak stand out every time.
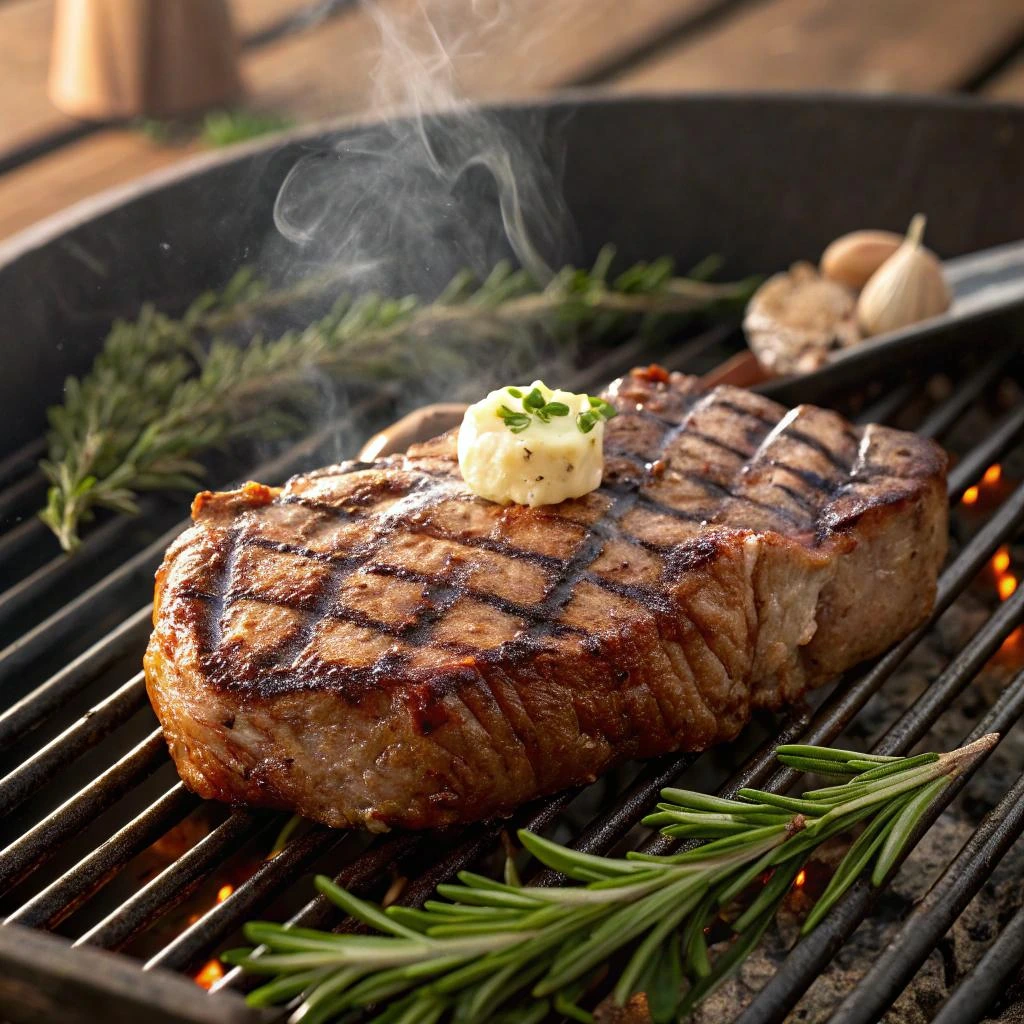
Adding Garlic Butter or Compound Butter
One of the easiest ways to elevate your steak is by finishing it with garlic butter or compound butter—a delicious touch that brings both flavor and richness.
- Garlic Butter: Melted garlic butter poured over your freshly grilled steak is a simple yet luxurious finishing touch. The garlic, herbs, and butter infuse the meat, creating a luscious, mouthwatering flavor profile.
- Compound Butter: This is a step up—a butter blended with herbs, spices, and sometimes cheese that you can place on top of the steak just before serving. Try mixing rosemary, thyme, and a touch of lemon zest, or get creative with blue cheese and chives for a tangy finish.
The key is to add the butter right after the steak is off the grill, so it melts beautifully over the hot meat.
Basting with Herbs and Oil
Basting your steak while it cooks adds richness and depth of flavor. While grilling, you can use a simple herb-infused oil or butter to baste the steak, adding moisture and flavor.
- Herb Oil: For extra flavor, add fresh herbs like rosemary, thyme, or garlic to oil (or butter) and brush it on the steak while it’s grilling. This infuses the steak with aromatic flavors.
- Butter Basting: In the final stages of grilling, add butter to the grill and let it melt around the steak. This will help form a nice, crispy, caramelized exterior while enhancing the steak’s juiciness.
Basting adds not only flavor but also that beautiful, golden-brown finish on the surface of your steak.
Serving with Sauces and Condiments
To bring even more flavor complexity to your steak, consider serving it with a complementary sauce or condiment.
- Chimichurri: A bright, herbaceous Argentinian sauce made with parsley, garlic, vinegar, and olive oil. Perfect for leaner cuts like flank steak, skirt steak, or sirloin.
- Béarnaise or Hollandaise: These rich, buttery sauces, often made with tarragon, are ideal for steaks that need a creamy, slightly tangy complement.
- Blue Cheese Sauce: For those who love bold flavors, a blue cheese sauce pairs exceptionally well with a rich, fatty cut like ribeye.
- Steak Sauce or Mustard: Sometimes, a simple dollop of your favorite steak sauce or a touch of tangy mustard can add a new layer of flavor without overpowering the meat.
Common Mistakes to Avoid
Even seasoned grillers can make a few missteps. Here are common mistakes to avoid when grilling steak:
- Flipping Too Often: Resist the urge to flip your steak every minute. Flip once—this allows for even cooking and creates a great crust.
- Pressing Down on the Steak: Don’t press the steak with your spatula; this squeezes out juices and dries out the meat.
- Skipping the Resting Period: Cutting into your steak immediately after grilling will result in a loss of juices. Let it rest for at least 5-10 minutes to retain moisture and ensure a tender bite.
- Not Monitoring the Temperature: Always check the internal temperature using a meat thermometer. Relying on visual cues alone can lead to undercooking or overcooking.
Pairing with Sides and Beverages
Pair your steak with the perfect sides and drinks to complement its rich flavors.
- Sides: Grilled vegetables, mashed potatoes, creamy mac and cheese, or a fresh arugula salad with balsamic vinaigrette are classic steak side dishes.
- Wine Pairing: Full-bodied red wines like Cabernet Sauvignon, Malbec, or Zinfandel are perfect choices to balance the richness of steak.
- Beer Pairing: Opt for a stout or porter for a bold contrast or a pale ale for something lighter.